


Edible Skull Bowls for Halloween!
“Witches and goblins, ghouls and ghosts but that’s not what children focus on most! They all want to see how much candy they can eat, the most important part of Halloween is a good TRICK or TREAT!”
The Skeleton in the Closet – A Halloween Tradition
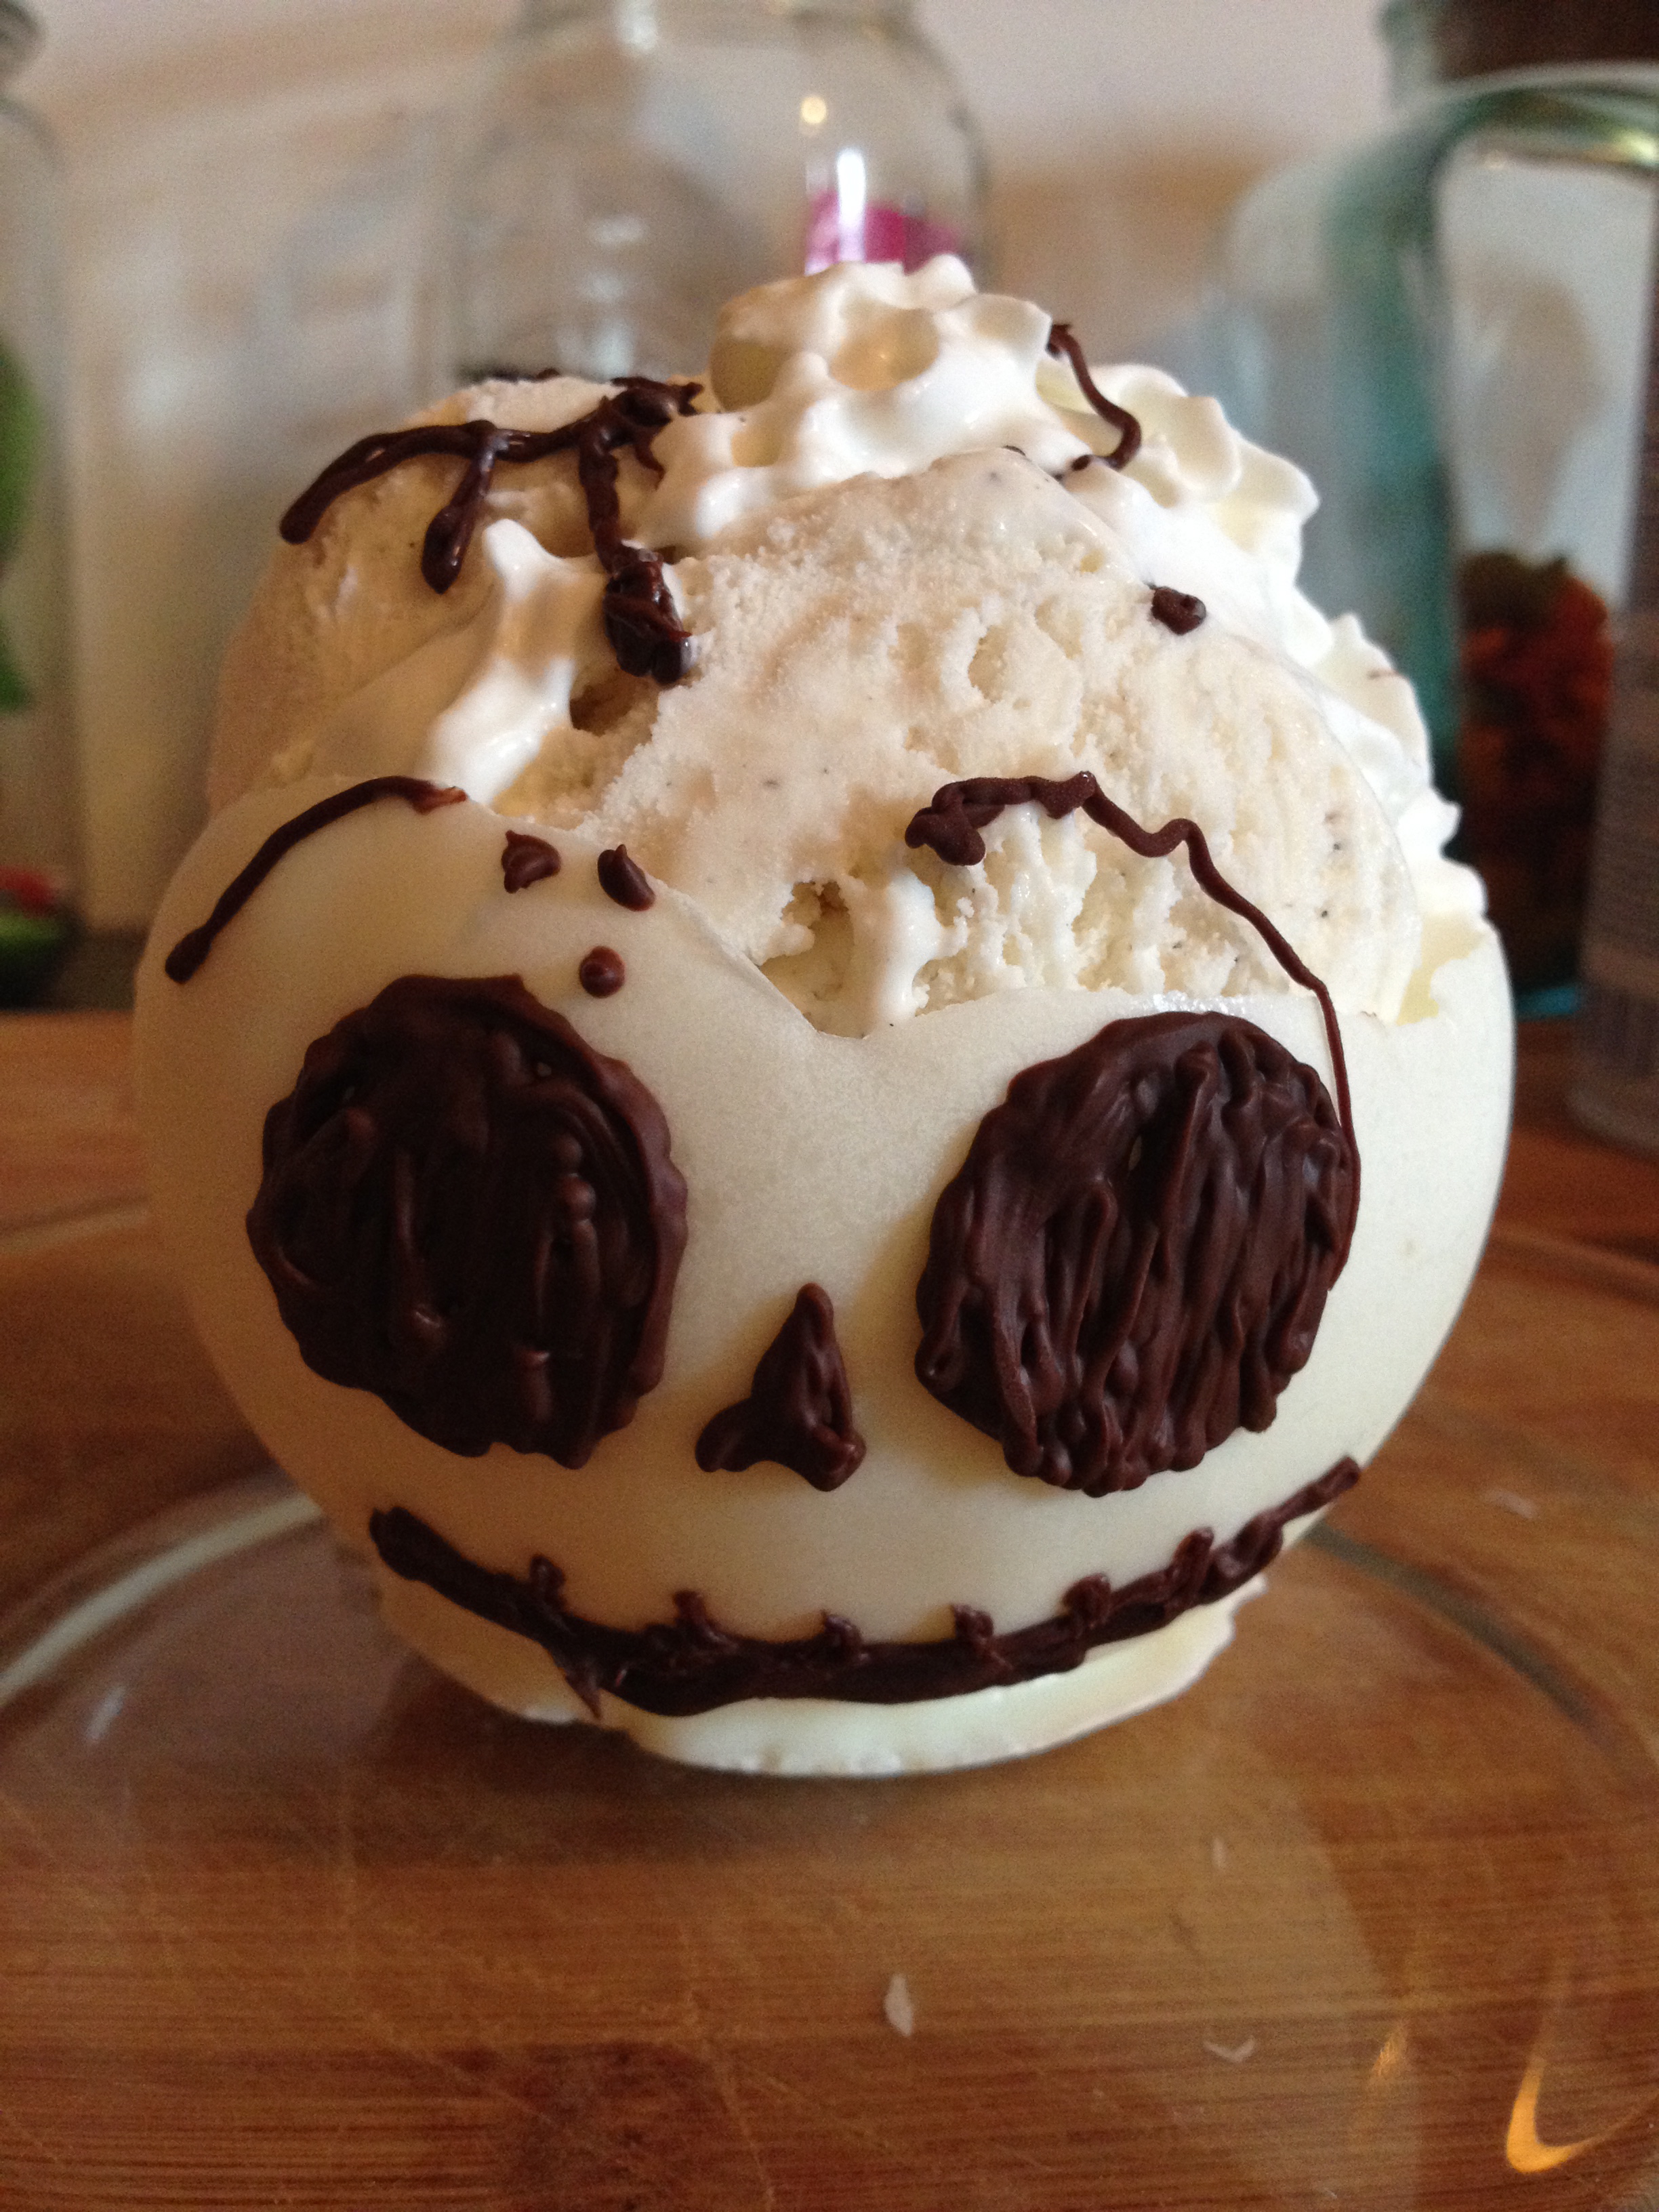
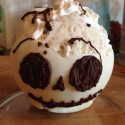
These adorable skull bowls are edible! They are made from white chocolate chips and the face is drawn on with semi sweet chocolate chips. Yummy! Not only are they delicious, they are also easy and fun to make! You only need a few items on hand!
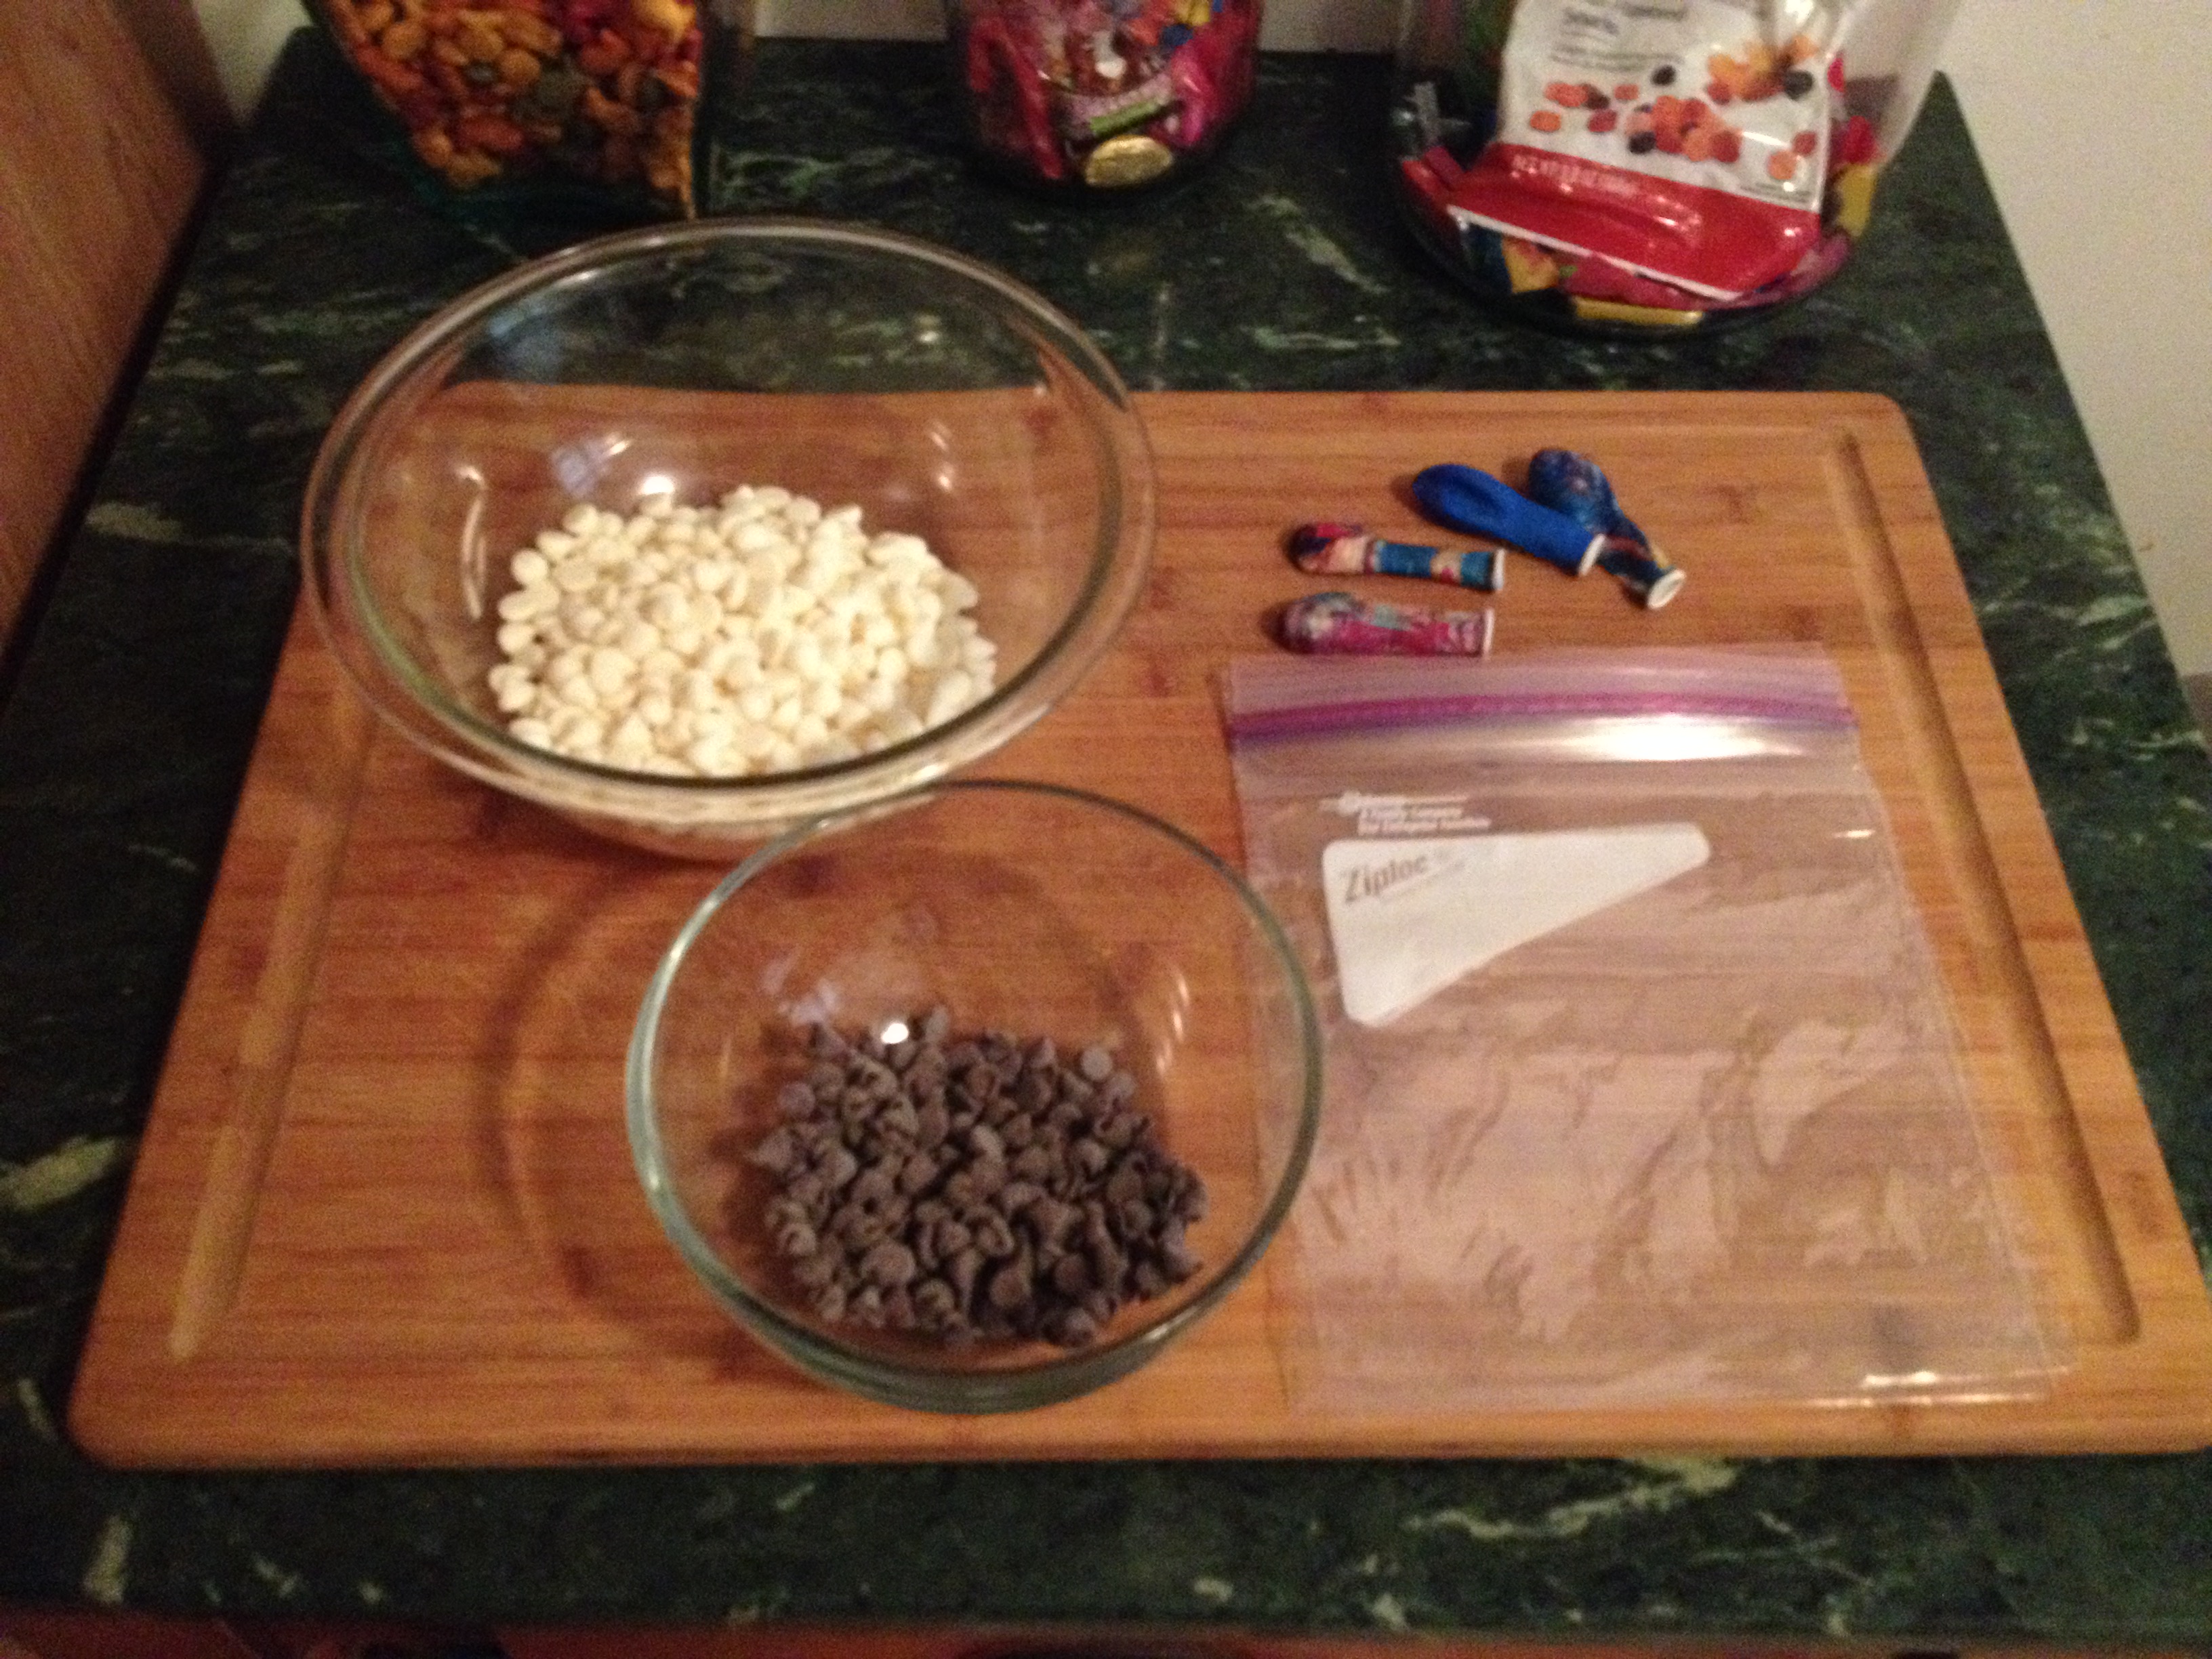
Items you’ll need for edible Halloween bowls:
- 12oz bag of white chocolate chips
- 1/2 cup Semi sweet chocolate chips
- Water balloons
- Plastic sandwich bag
- Parchment paper (or wax paper)
- Cookie sheet
- Ice cream or treats of choice for filling bowl
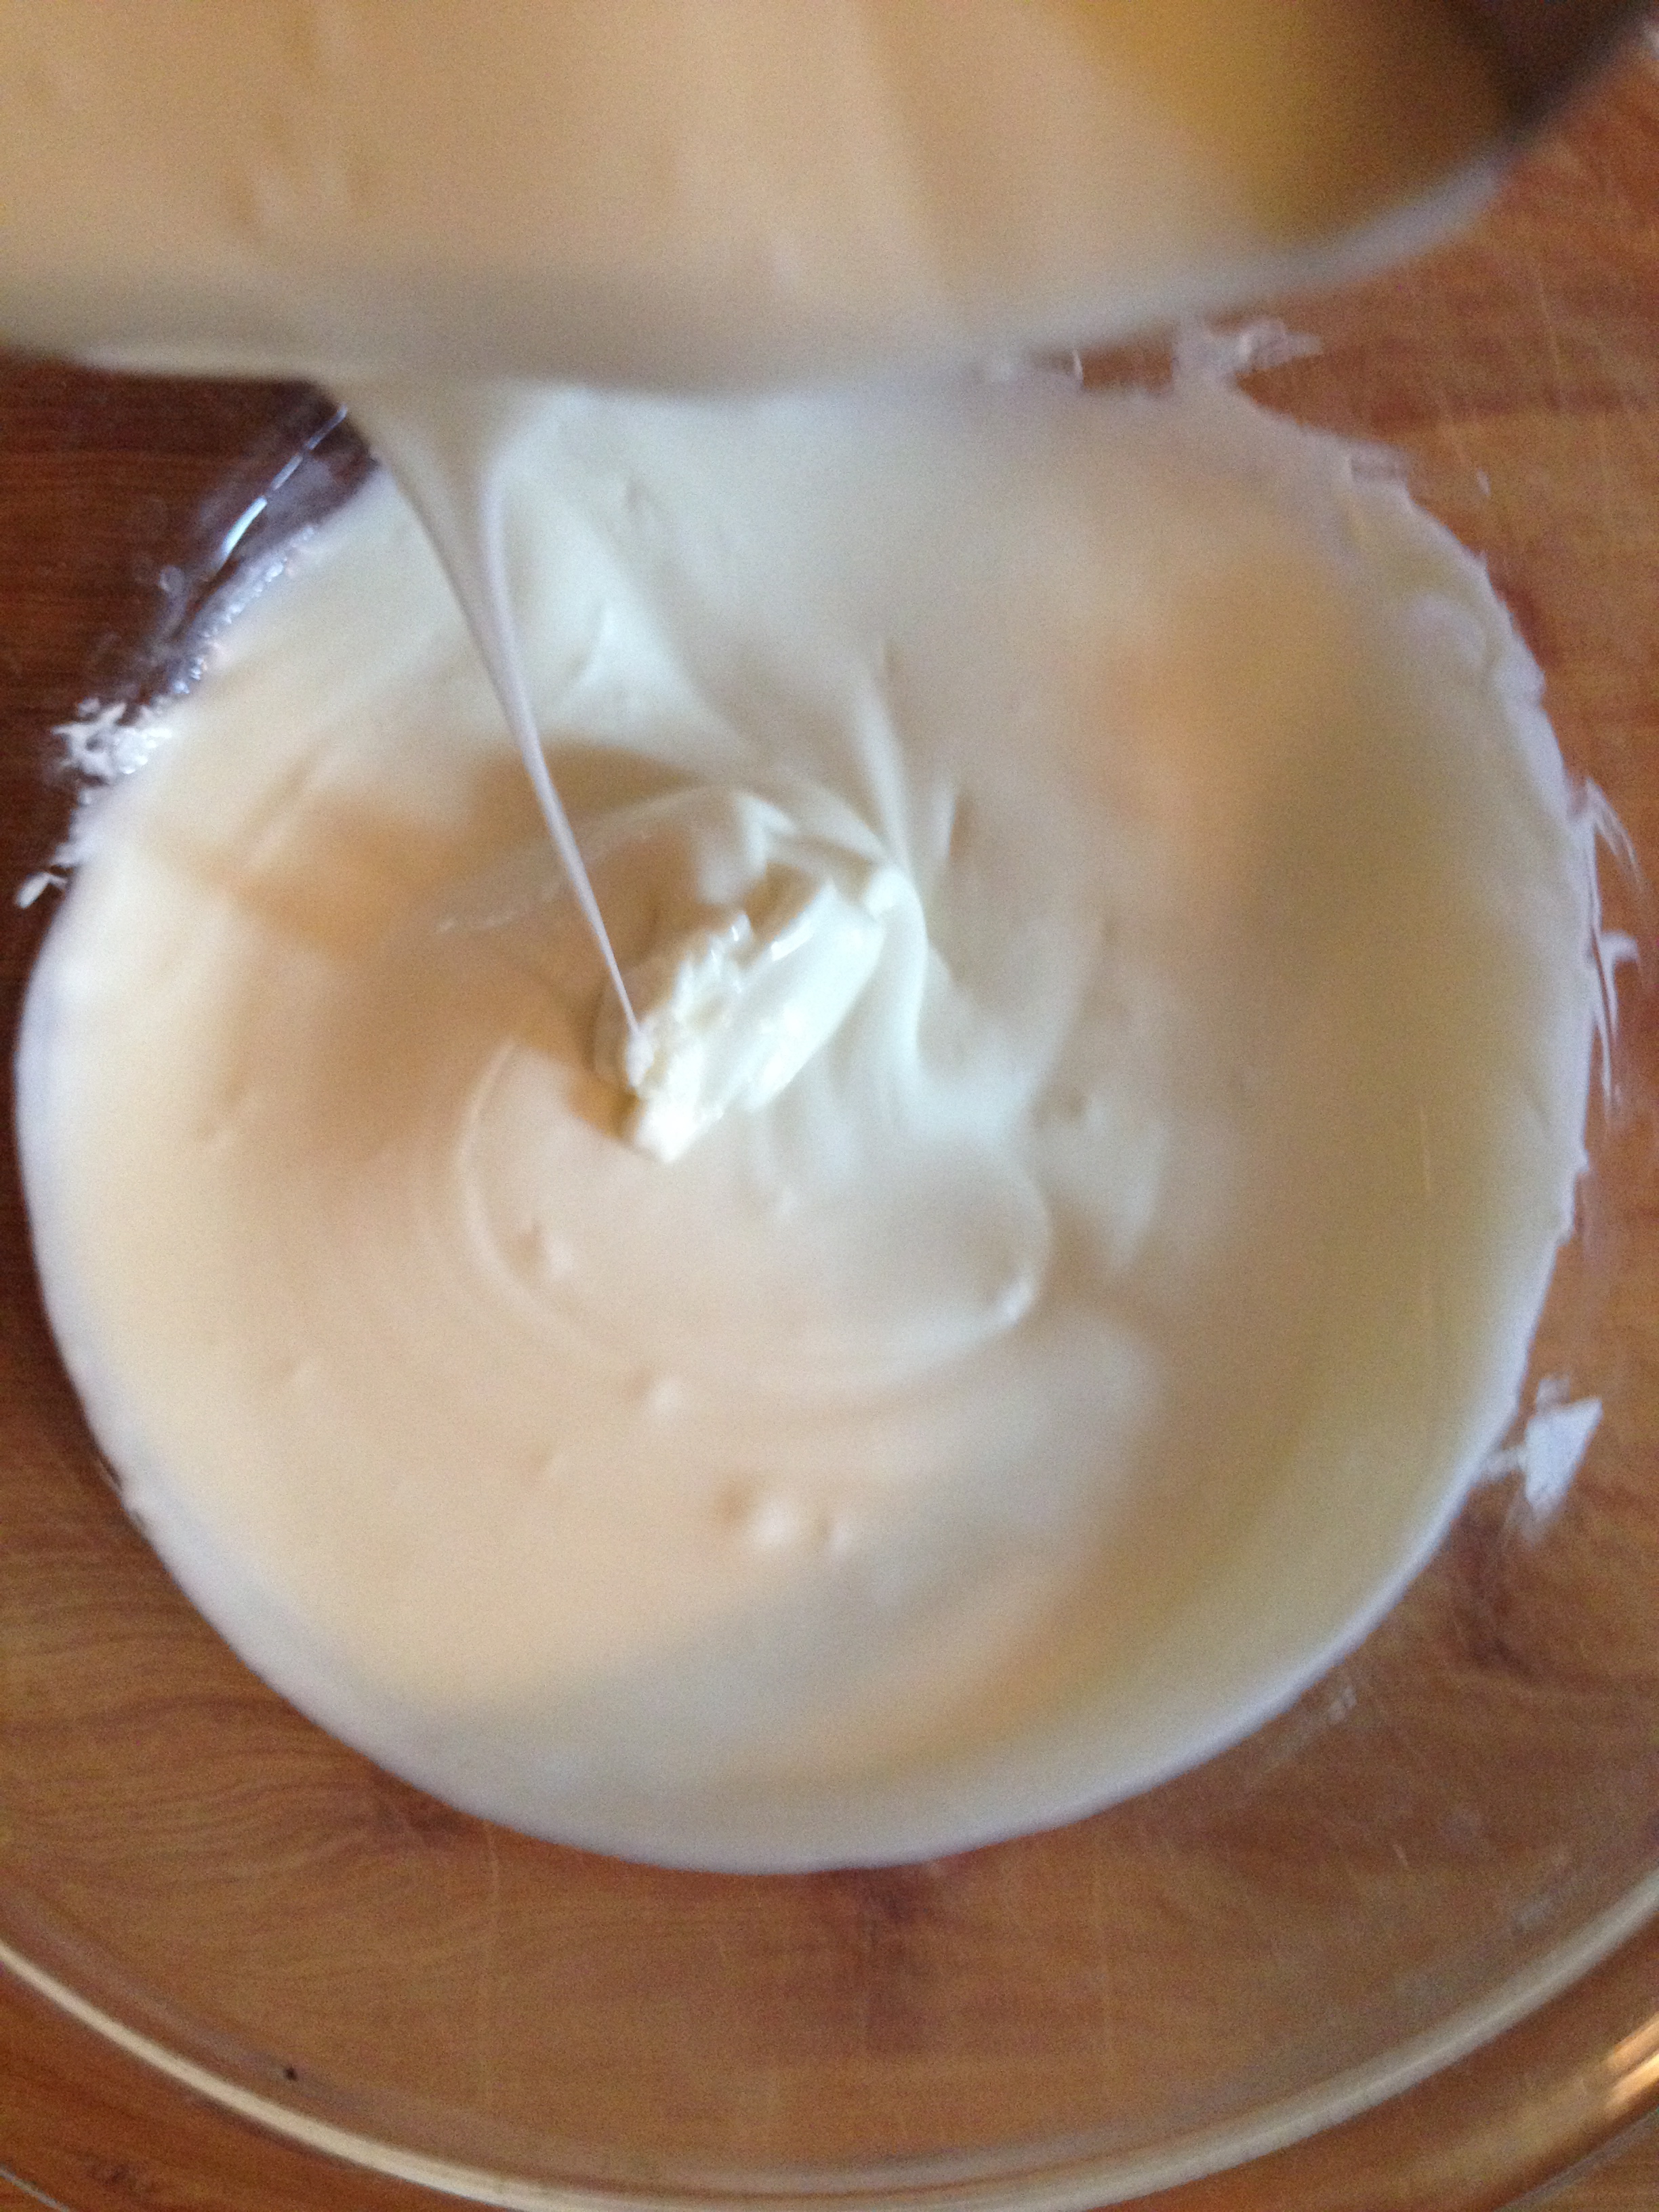
Pour entire bag of white chocolate chips into a microwave-safe bowl. Microwave them in 30-second increments, stirring after every 30 seconds, until melted and smooth (about 1 ½ minutes). The texture should be on the thinner side. If it seems thick or clumpy, stir in a spoonful of shortening or oil (coconut or vegetable), and mix until smooth. Set aside to cool a bit.
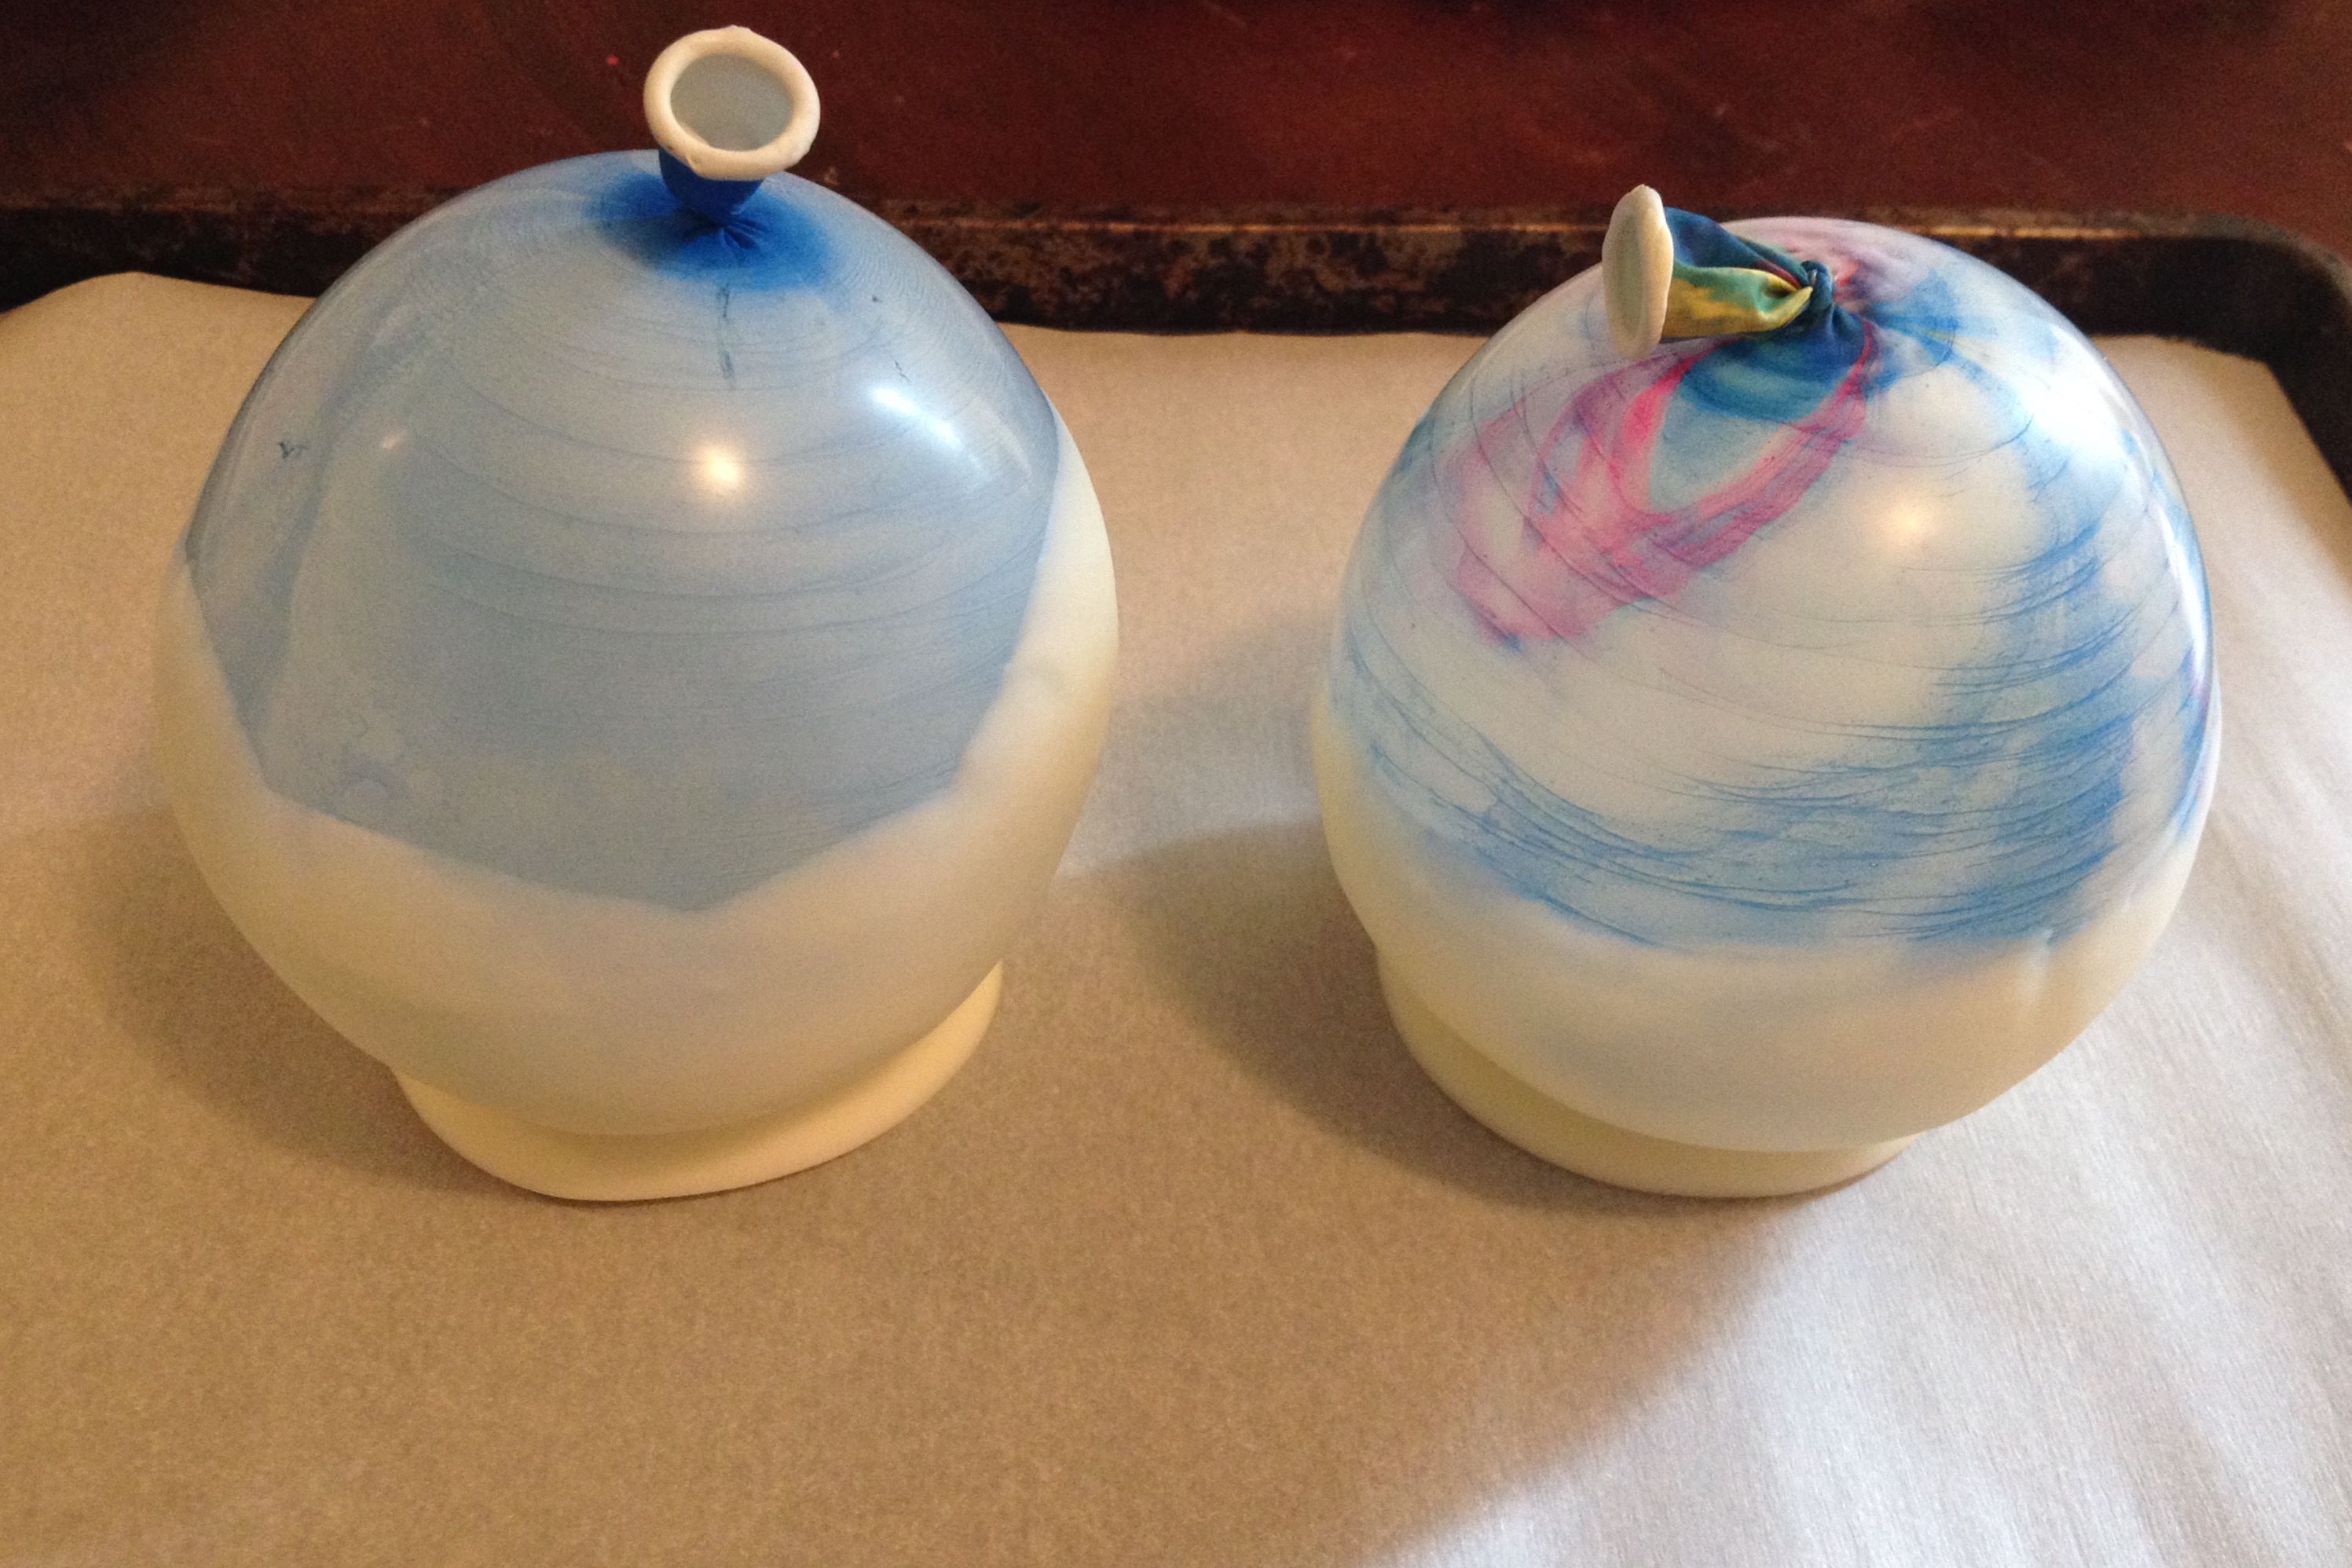
This is a good time to blow up as many balloons as cups you plan to make (I like to make a couple extra, just in case one breaks). I find that I can make 6-8 bowls (depending on how big the balloons are blown up). Once your balloons are ready, hold one at a time by the knot and dip it in the white chocolate until it comes halfway up the sides of the balloon. Rotate and dip it so that the sides are evenly coated. Remove the balloon from the coating and let the excess drip back into the bowl. Place balloons on cookie sheet lined with parchment or wax paper and place in the fridge to cool and harden (about 30mins).
Once chilled and hardened, its time to remove the balloons! This is the trickiest part. Please take your time and have patience. For the best results, hold the balloon tightly right below the knot. Cut a small hole above your fingers, and slowly let air out of the balloon. You will notice it starts to pull away from the edges of the bowl (you may need to help it detach by lightly/gently pulling on the balloon.) If you do this part too quickly the bowl may chip or break. Please take your time!
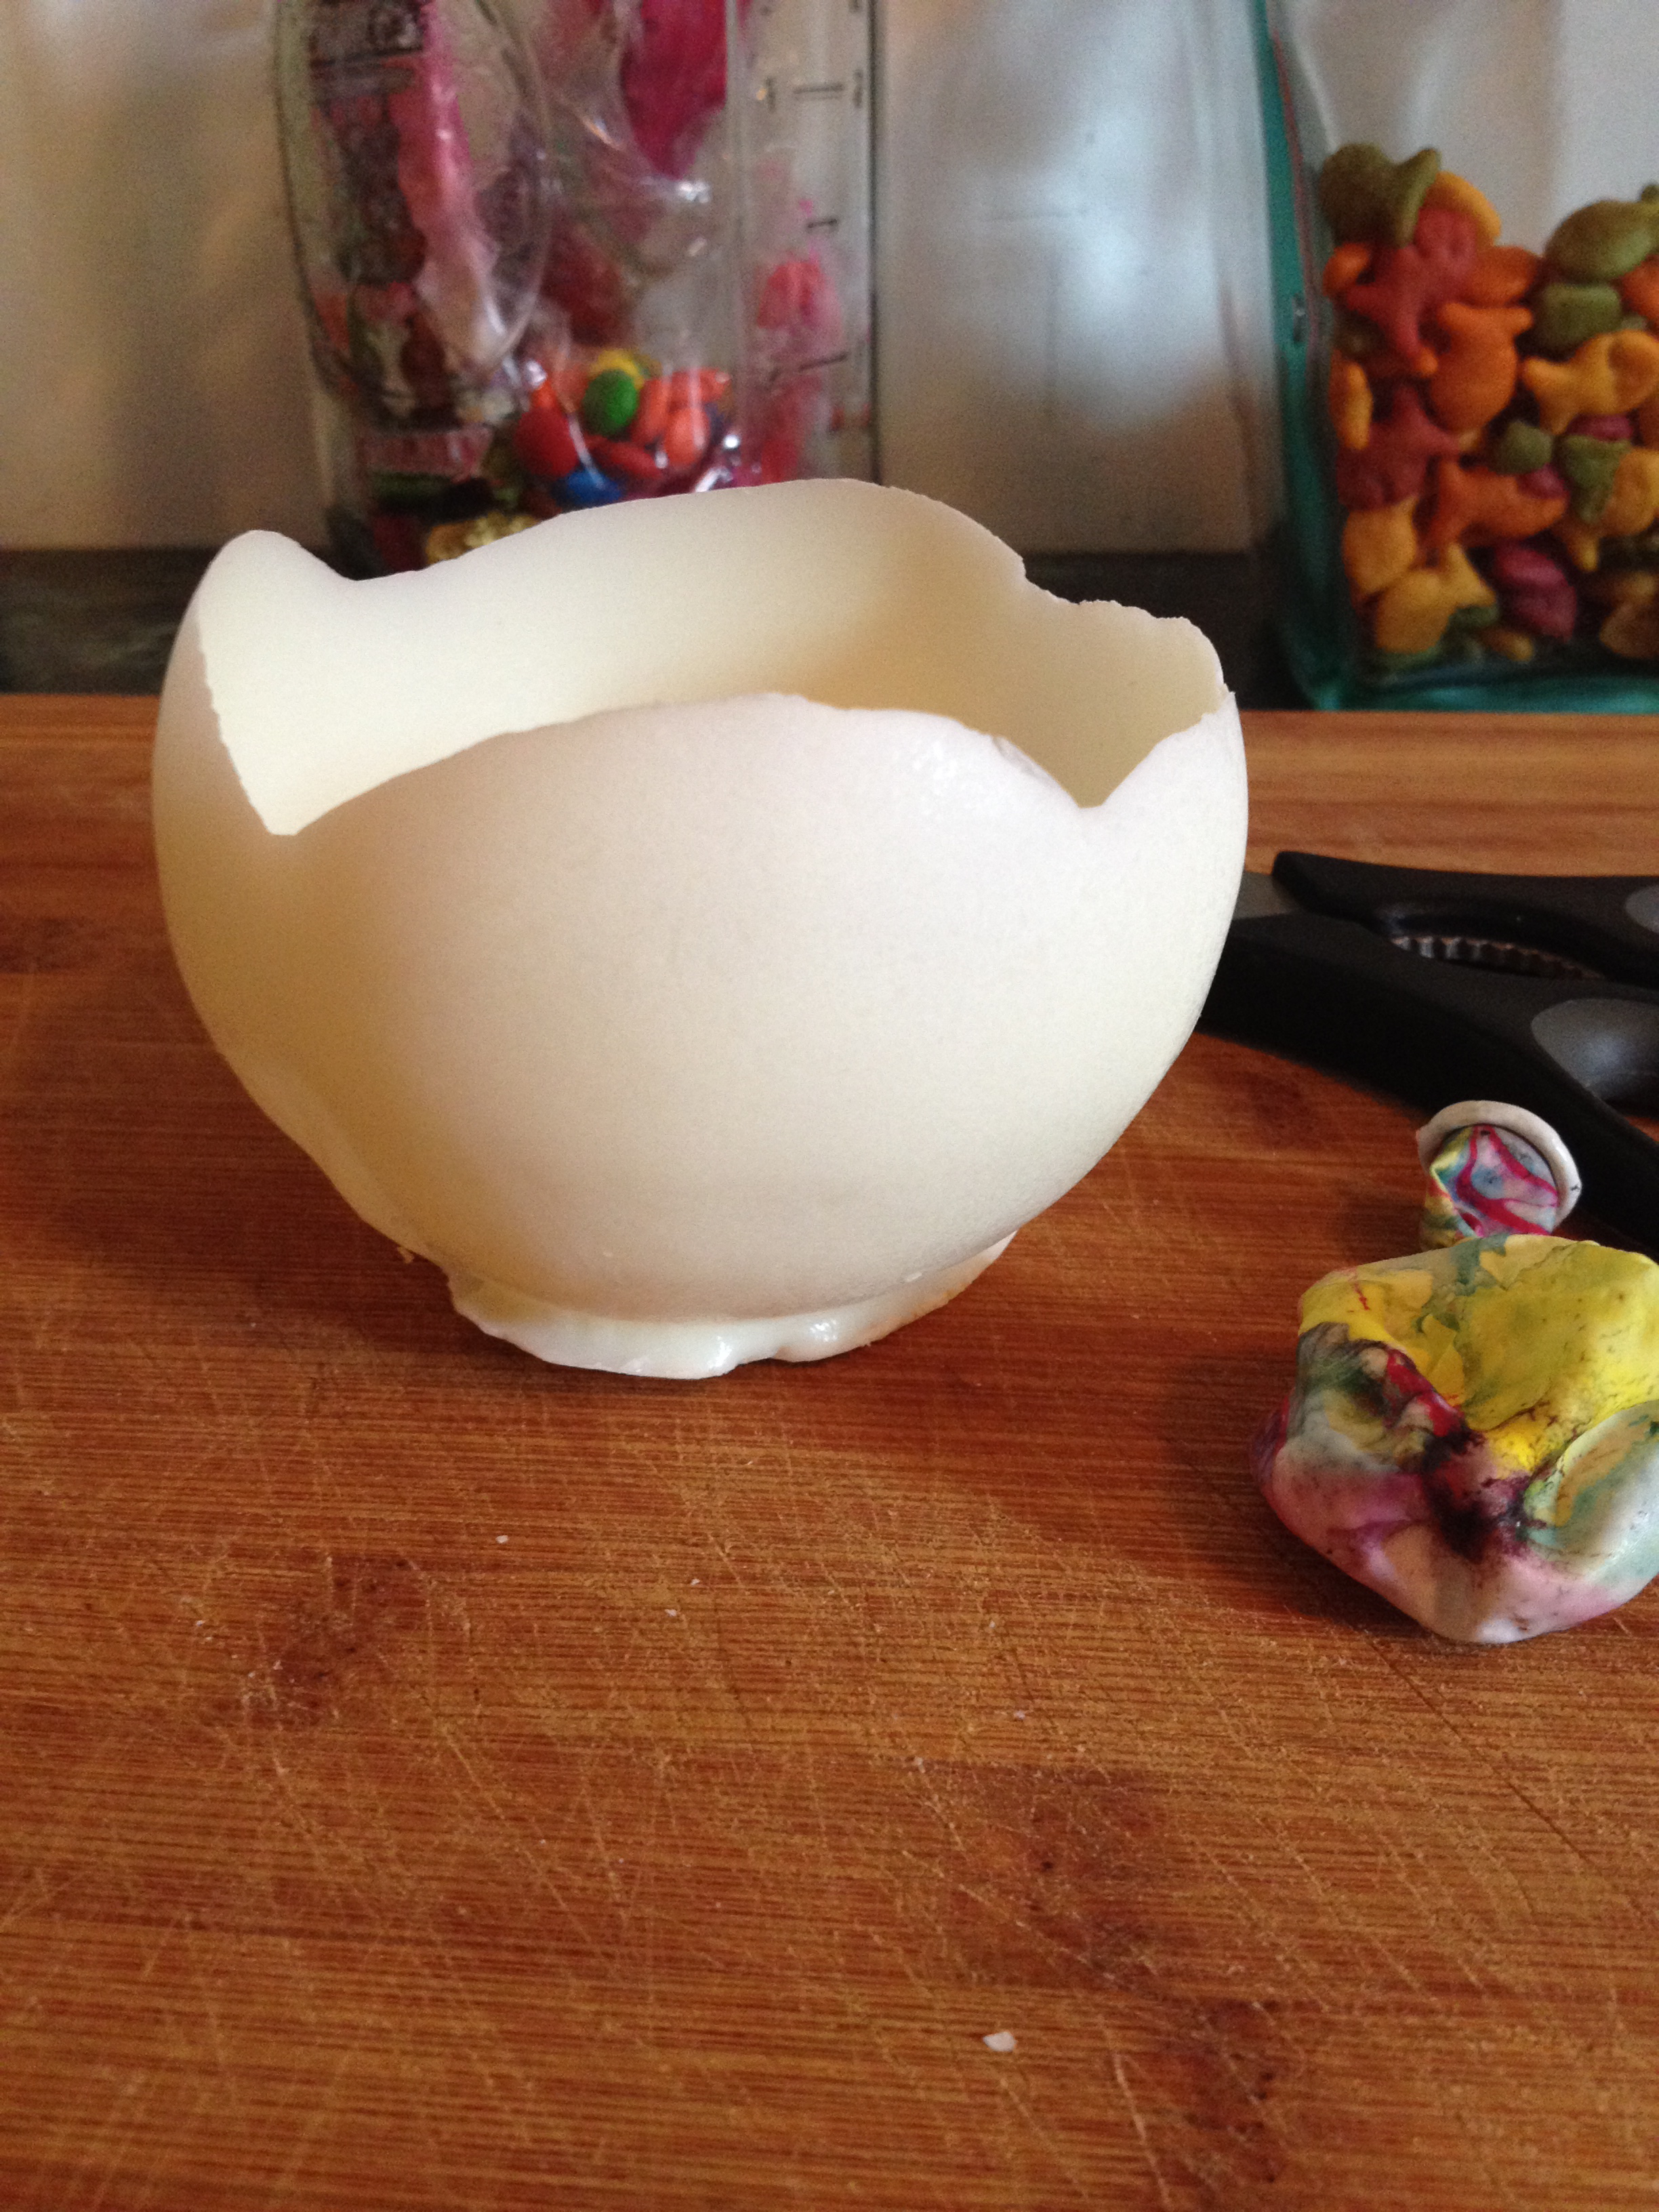
I like to keep the uneven edges on my cups, cause it helps give the skull shape, but you can shave down the edges to be smooth, if you like.

Now, it’s time to melt your semi sweet chocolate chips. Because you are using a smaller amount of chips, I recommend heating it for 15 seconds at a time until melted and smooth. Allow the chocolate to cool a bit and then transfer it to a plastic sandwich bag (be sure to push all the chocolate toward one corner of the bag). Take a pair of scissors and cup the tip off the end of the bag to create a small opening.
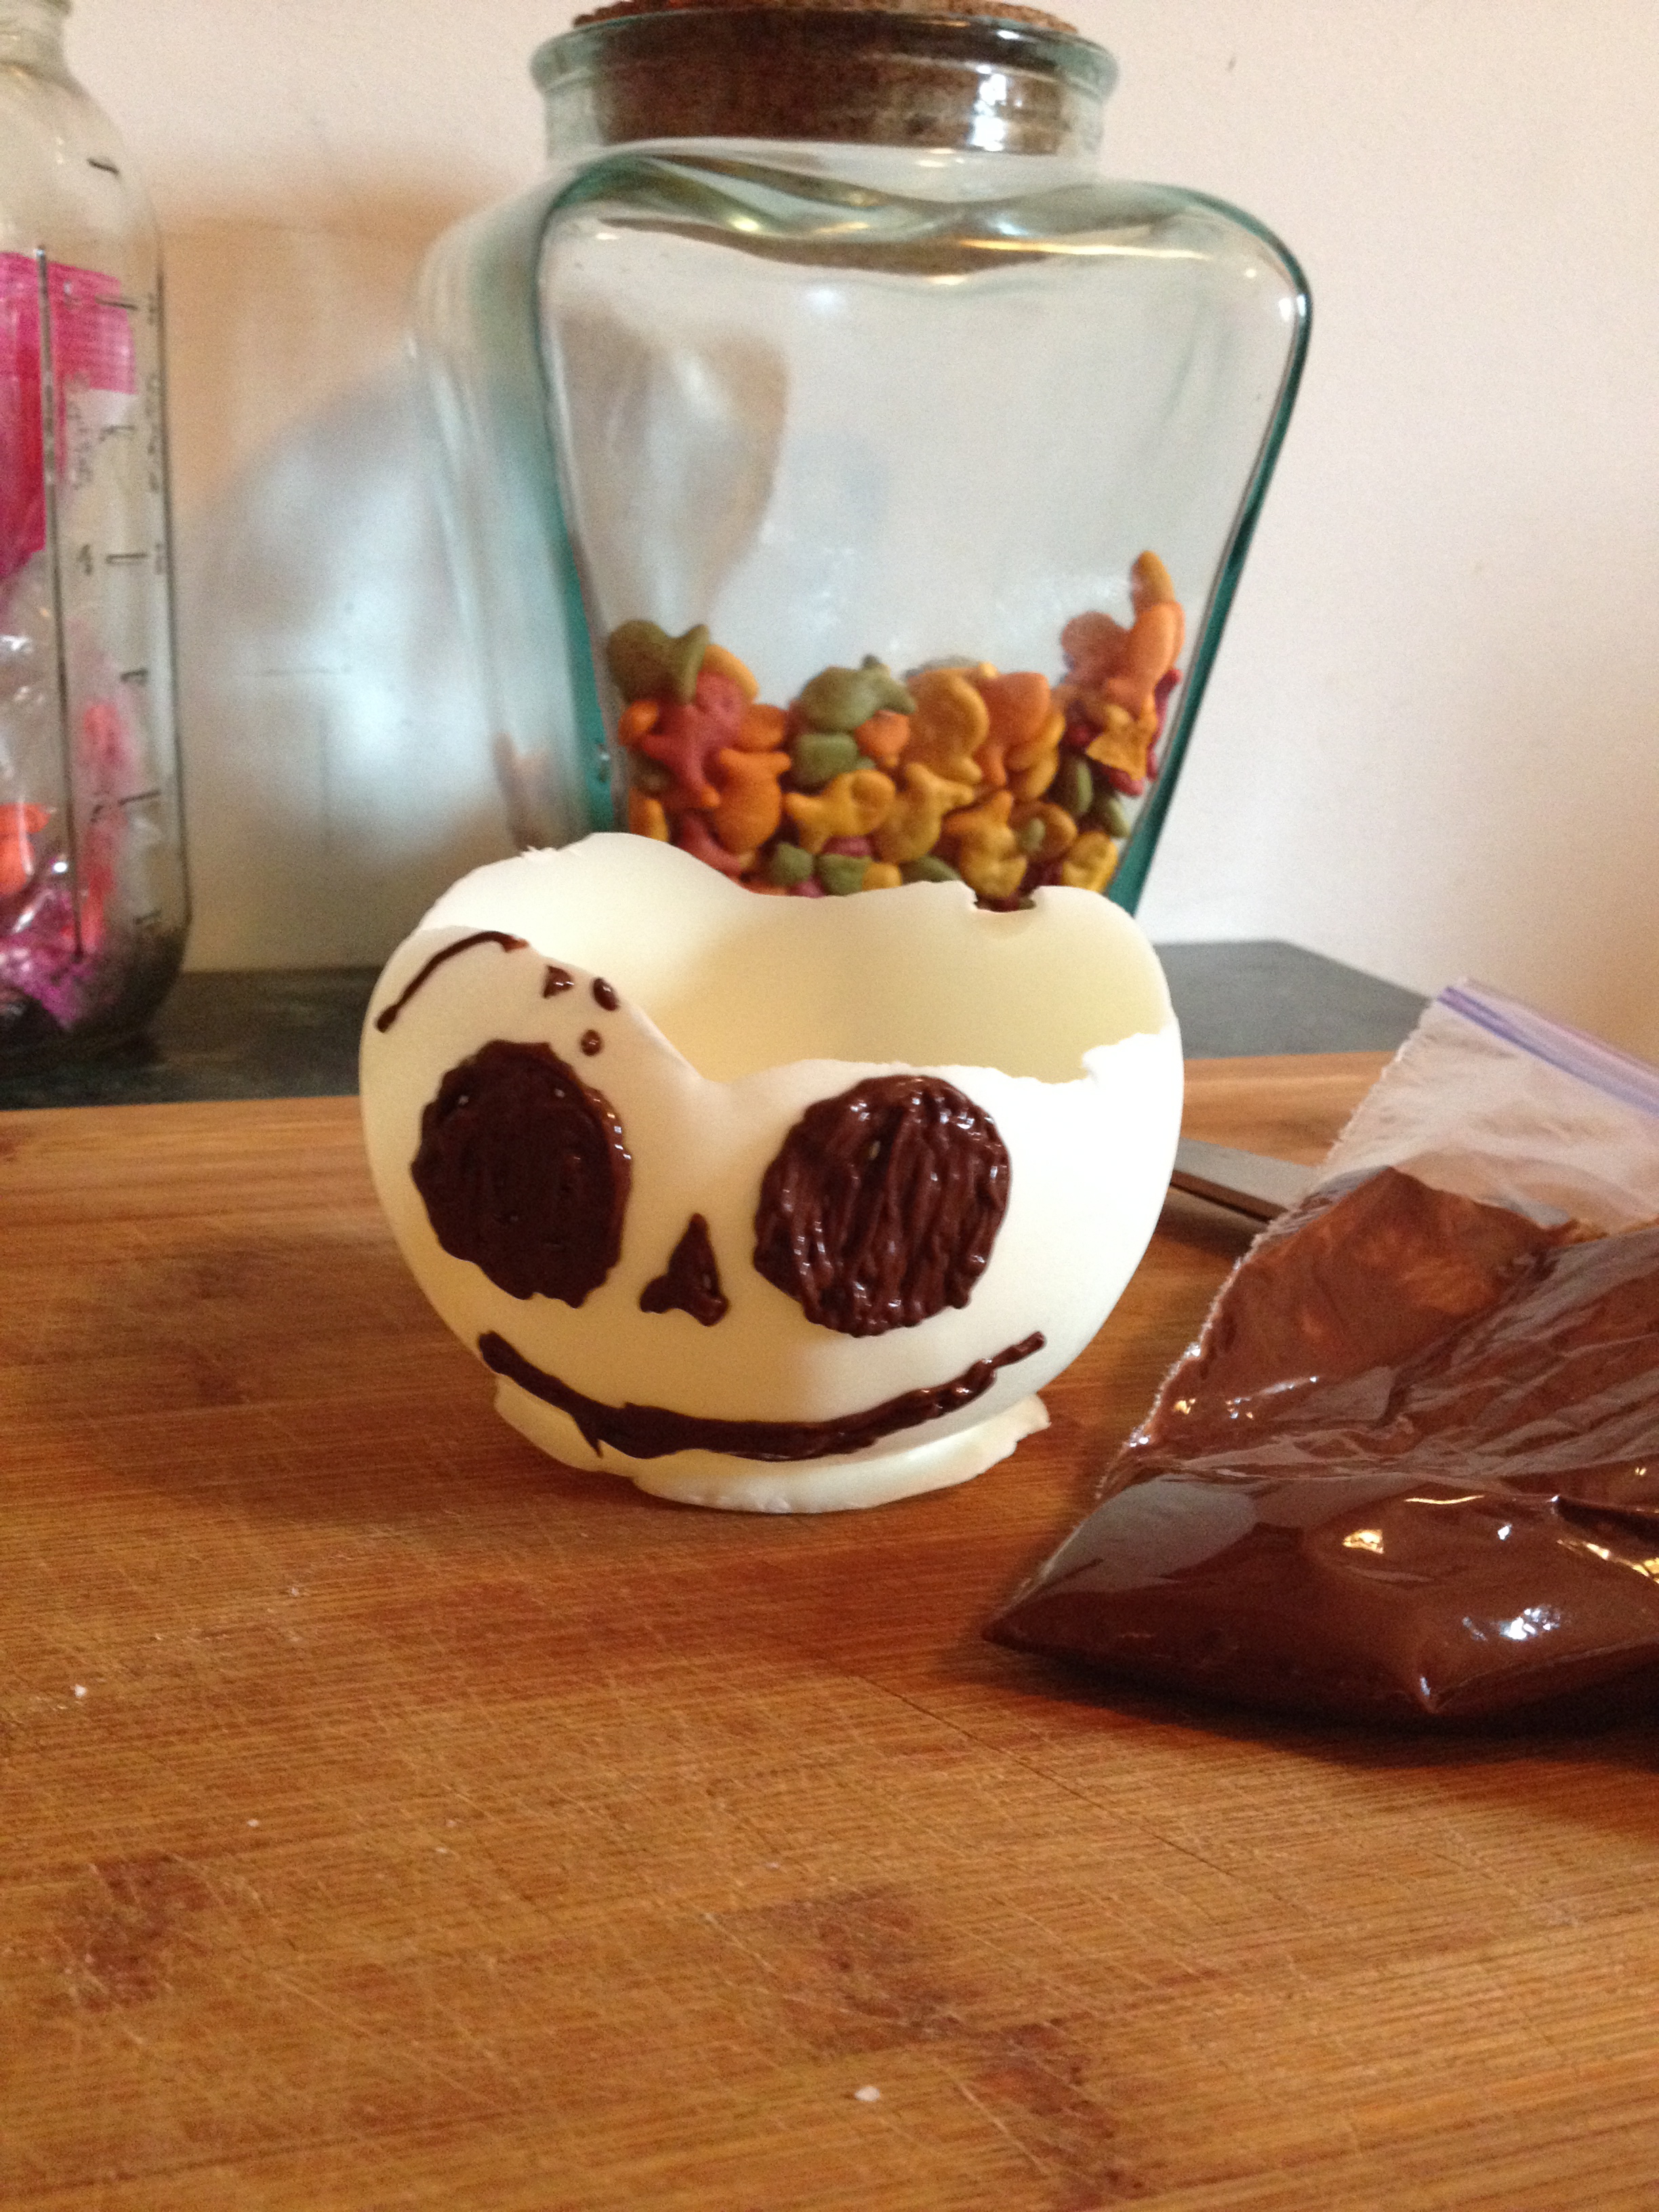
To draw your “Skeleton in the Closet” face, just try your best and HAVE FUN!!! He has two big round eyes, a triangle nose and a silly crooked smile! Don’t forget to add three freckle dots by his eyes! Once you’ve drawn your faces on the skull bowls, return them to the fridge to set for 10 minutes.
Now for the BEST part!! Create your Halloween ice cream sundae! I used vanilla bean ice cream and whipped cream to create the rest of his skull shape. Then I took some of the remaining chocolate in the bag and drew some cracks on his skull (the ice cream) to complete the look! You can also use these bowls to hold all kinds of different Halloween candy, then you can eat the bowl! It’s a win – win!
This was such a fun and tasty Halloween treat for us! Have fun with your own skull bowl creations and please share them with us on Facebook, Twitter, Instagram and Pinterest! Lastly, we adapted this chocolate bowl tricky treat recipe from the Oh Nuts! Sweet and Crunchy Blog – Edible Pumpkin Candy Bowls. Be sure to check out their version of these cool candy bowls! Happy Halloween and Happy Trick or Treating!!!


Sorry, comments are closed for this post.